Showing posts with label garden tote. Show all posts

Tuesday, May 11

Spring to Finish Challenge halfway check-in

close-up.JPG
(more on this later)

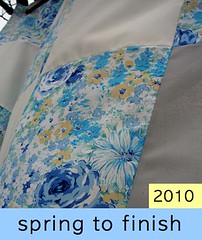
Yesterday was the half-way point for the Spring to Finish Challenge. So far, I've checked four things off my list... six to go — yipes. I think I may modify my list... I don't want to rush through the quilting on the Pinwheel Sampler, so my new goal is to have the top assembled by May 31. That's not cheating too much, right?

My family came to Austin on Sunday for Mother's Day since I had to work that night (oh the joys of working in a 24/7/365 business). My brother came a little early so we could get the garden tote all filled with goodies:

garden tote.JPG

Our mom loved it! We went to the park to see a play by a local theater group called Austin Shakespeare. They put on a play in the park each year, and they had a special Mother's Day matinee. When you're part of a huge group of people picnicing, you're going to see quite a few quilts:

picnic.JPG

I really liked how these two huge quilts matched. I couldn't get close enough to see if they were "real" quilts or the mass-manufactured ones you can buy at a home decor place. My family used a quilt that my mom's step-grandmother had given her for her high-school graduation. We've used this thing for picnics my entire life. It has definitely seen better days.

step-great-grandmother's quilt.JPG

I realized this weekend that it's entirely hand-pieced and hand-quilted. Wow. The reason I could tell it was hand-pieced is that some of the stitches are coming open. My mom said she wants me to take it apart and fix it someday. The key word there is someday... :)

nautical print.JPG

I'm loving this nautical print. I wish I knew more about the fabrics. I wonder if they were leftover scraps, or if they were meant for the quilt. I'm leaning toward leftover scraps, but I guess I'll never really know.

Do you have any heirloom quilts in your family?

Friday, April 9

Exciting day

Fridays are awesome. Fridays are the only day of the week that I have no obligations. I usually spend my Fridays in my pajamas (all day) sitting at my sewing machine.

Last night, I finished the shell of the tote bag for my mom (yay!):

tote outer shell.JPG

The materials for the lining and handles are all cut and ready to go, but I wanted to get started on this, which needs to be completed a few weeks before the tote:

painters tape.JPG
(bad picture, but you get the idea)

I just finished marking guides for quilting the Happy Campers quilt! I had to take a break to eat, so I thought I'd post this little update. It took longer than I thought to get the tape on there right, but I developed a system after a bit and it started to speed up. I've used painters tape to mark once before, on the hanging organizer I made last week. It worked really well. The best part is that you don't have to actually mark on the quilt! The tape is made with a very gentle adhesive, so it comes off easily when you're done, and it doesn't leave any icky residue on the fabric. Oh, and you can re-use it a few times before it completely loses its tackiness. I'm hoping I won't have to make any more tape-squares; I can just move these from row to row as I go.

And now I am in need of advice from all you lovely seamsters and seamstresses out there. I have little to no experience sewing clothing. My boyfriend came home from work today and showed me this ...

sad pants.JPG

... a huge rip in the only pair of pants he has to wear to work. I have today and tomorrow to fix it. I assume I'll need a patch of some type. I am in dire need of recommendations and tips. Seriously, explain it to me like I'm five years old. I have to have these fixed in about 24 hours :/

Thursday, April 8

Free-motion quilting, a tool to avoid and another to buy ASAP

free-motion practice.JPG

Well there you have it. My first efforts in free-motion quilting. It for a tote bag I'm making for my mom for Mother's Day, based on this Sew, Mama, Sew tutorial. The quilting is far from perfect, but I'm actually pretty happy with it. It's turning out better than I thought it would. A lot of it will be covered by pockets, and my mom won't mind the imperfections since I made it for her. The colors are a little less Spring-y than I wanted, but I saw this fabric (thumbnail at right), and it was just perfect for the lining and pockets! The tutorial recommended using a home-dec. weight fabric for the outer shell of the bag, to give it a little more strength. I got this gold stripe on sale 40% off at Jo-Ann. The colors actually match my mom's living room decor, oddly enough, so I know she'll like them. Since I'm putting together the bag, my brother is going to help me fill it with gardening stuff as the rest of her gift.

finger grips.JPG

Can you see how the gold fabric is kind of shiny? This means it is slippery! I had gotten these quilters finger grips on a whim at Jo-Ann a while back and decided to try them out. I didn't even get through quilting one flower motif before I gave up on them. They were slippery on the inside and didn't quite fit my fingers (especially my thumb), so the grip would sort-of stick to the fabric while my finger slid around inside. Not good. I'm curious to know what (if anything) you guys use to hold your fabric while quilting.

But on to one of my most favorite notions:

kwik klip.JPG

I don't remember where I read about the Kwik Klip, but it is an absolute lifesaver when pin-basting — or perhaps I should say finger saver :) After I basted my Happy Campers quilt (which, with y'all as my witnesses, I will start quilting this weekend), my legs and back were sore from crawling on the floor hunched over the quilt sandwich, but my fingers were prick-free and not the least bit sore!

What are your favorite tools?